
Schedule exchange process
Import and export schedule
To import the schedule directly from MS Project or Primavera, activate the Schedule Editor and follow the process described below:
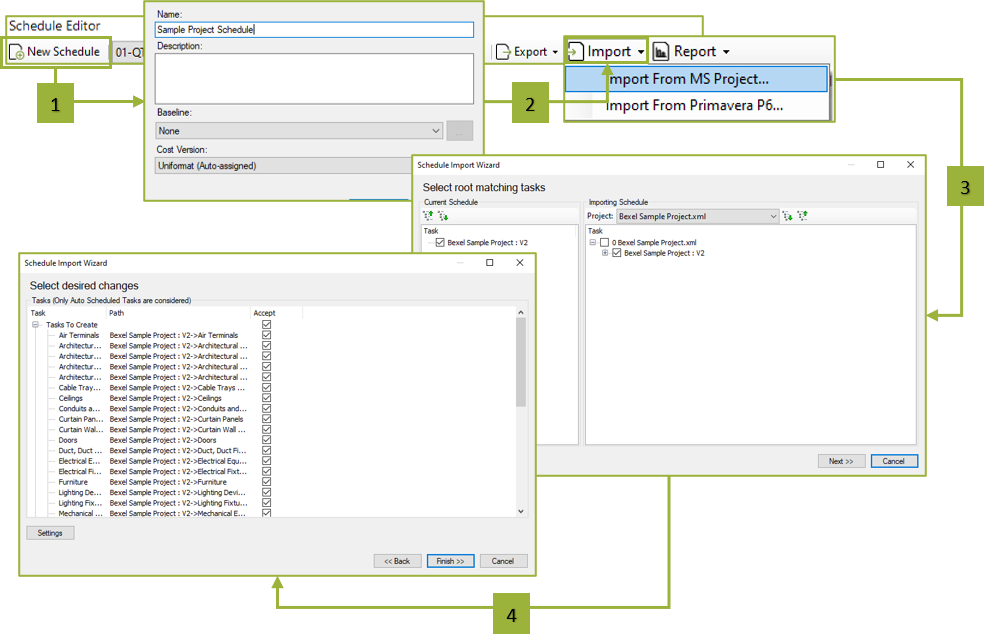
Click on the New Schedule command to create a new schedule within the Schedule Editor tab → Define Name, add Description if needed, and click OK → Click Import and choose an option From MS Project or From Primavera P6 → Choose a file and finish the step by clicking OK → In the Schedule Import Wizard window, choose the settings that suit the schedule and finish the process by clicking Finish.
After the process of linking the schedule with model elements is finished, the imported schedule can be analyzed in BEXEL Manager in different views, for example, Logic or Gantt. To activate the view of the schedule in the full screen, click the command Pop Out next to the commands Logic, Gant, and LOB. To deactivate the full screen, click on the Pop In button.
When importing the schedule from different software, for example, MS Project, an Import Settings window occurs, to define the settings of the imported schedule.
In the Working Hour Lag Calendar drop-down menu, define which calendar applies to the import process.
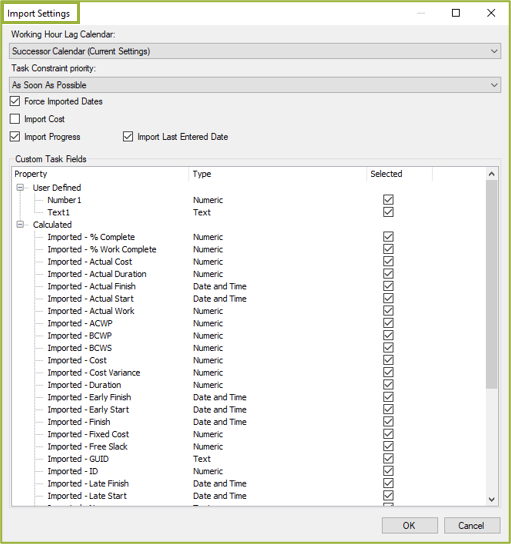
In the Task Constraint priority, it is possible to define what kind of relations will be set between tasks: As Soon As Possible or As Late as Possible. Also, boxes can be checked for options Force Imported Dates, Import Cost, Import Progress, and Import Last Entered Date, depending on the purpose of use of the imported schedule. Another useful option is setting which properties will be imported within the Custom Task Fields.
When the schedule is successfully imported, it can be reviewed within the Schedule Editor tab. The imported schedule can be edited on several levels and exported back to the original software. To do so, please follow the process below:
In the drop-down menu within the Schedule Editor, choose the schedule to export → Click Export to choose the software for example, MS Project → In the MS Project Settings window, in the Export to Level drop-down menu, define to which level the schedule will be exported → Mutual relationships can be exported by checking the checkbox next to the Include Relations → To export resources from the original schedule check the checkbox next to the Include Resources → Click Export → Within the Save As window, define the name and the location of the exported schedule and click Save.
Depending on the chosen software for exporting the schedule you can have different files format like .XML, .XLSX, or .PDF.
